Salesforce Integration
Celoxis Salesforce integration helps bridge the gap between your sales and delivery teams, thereby improving business outcomes.
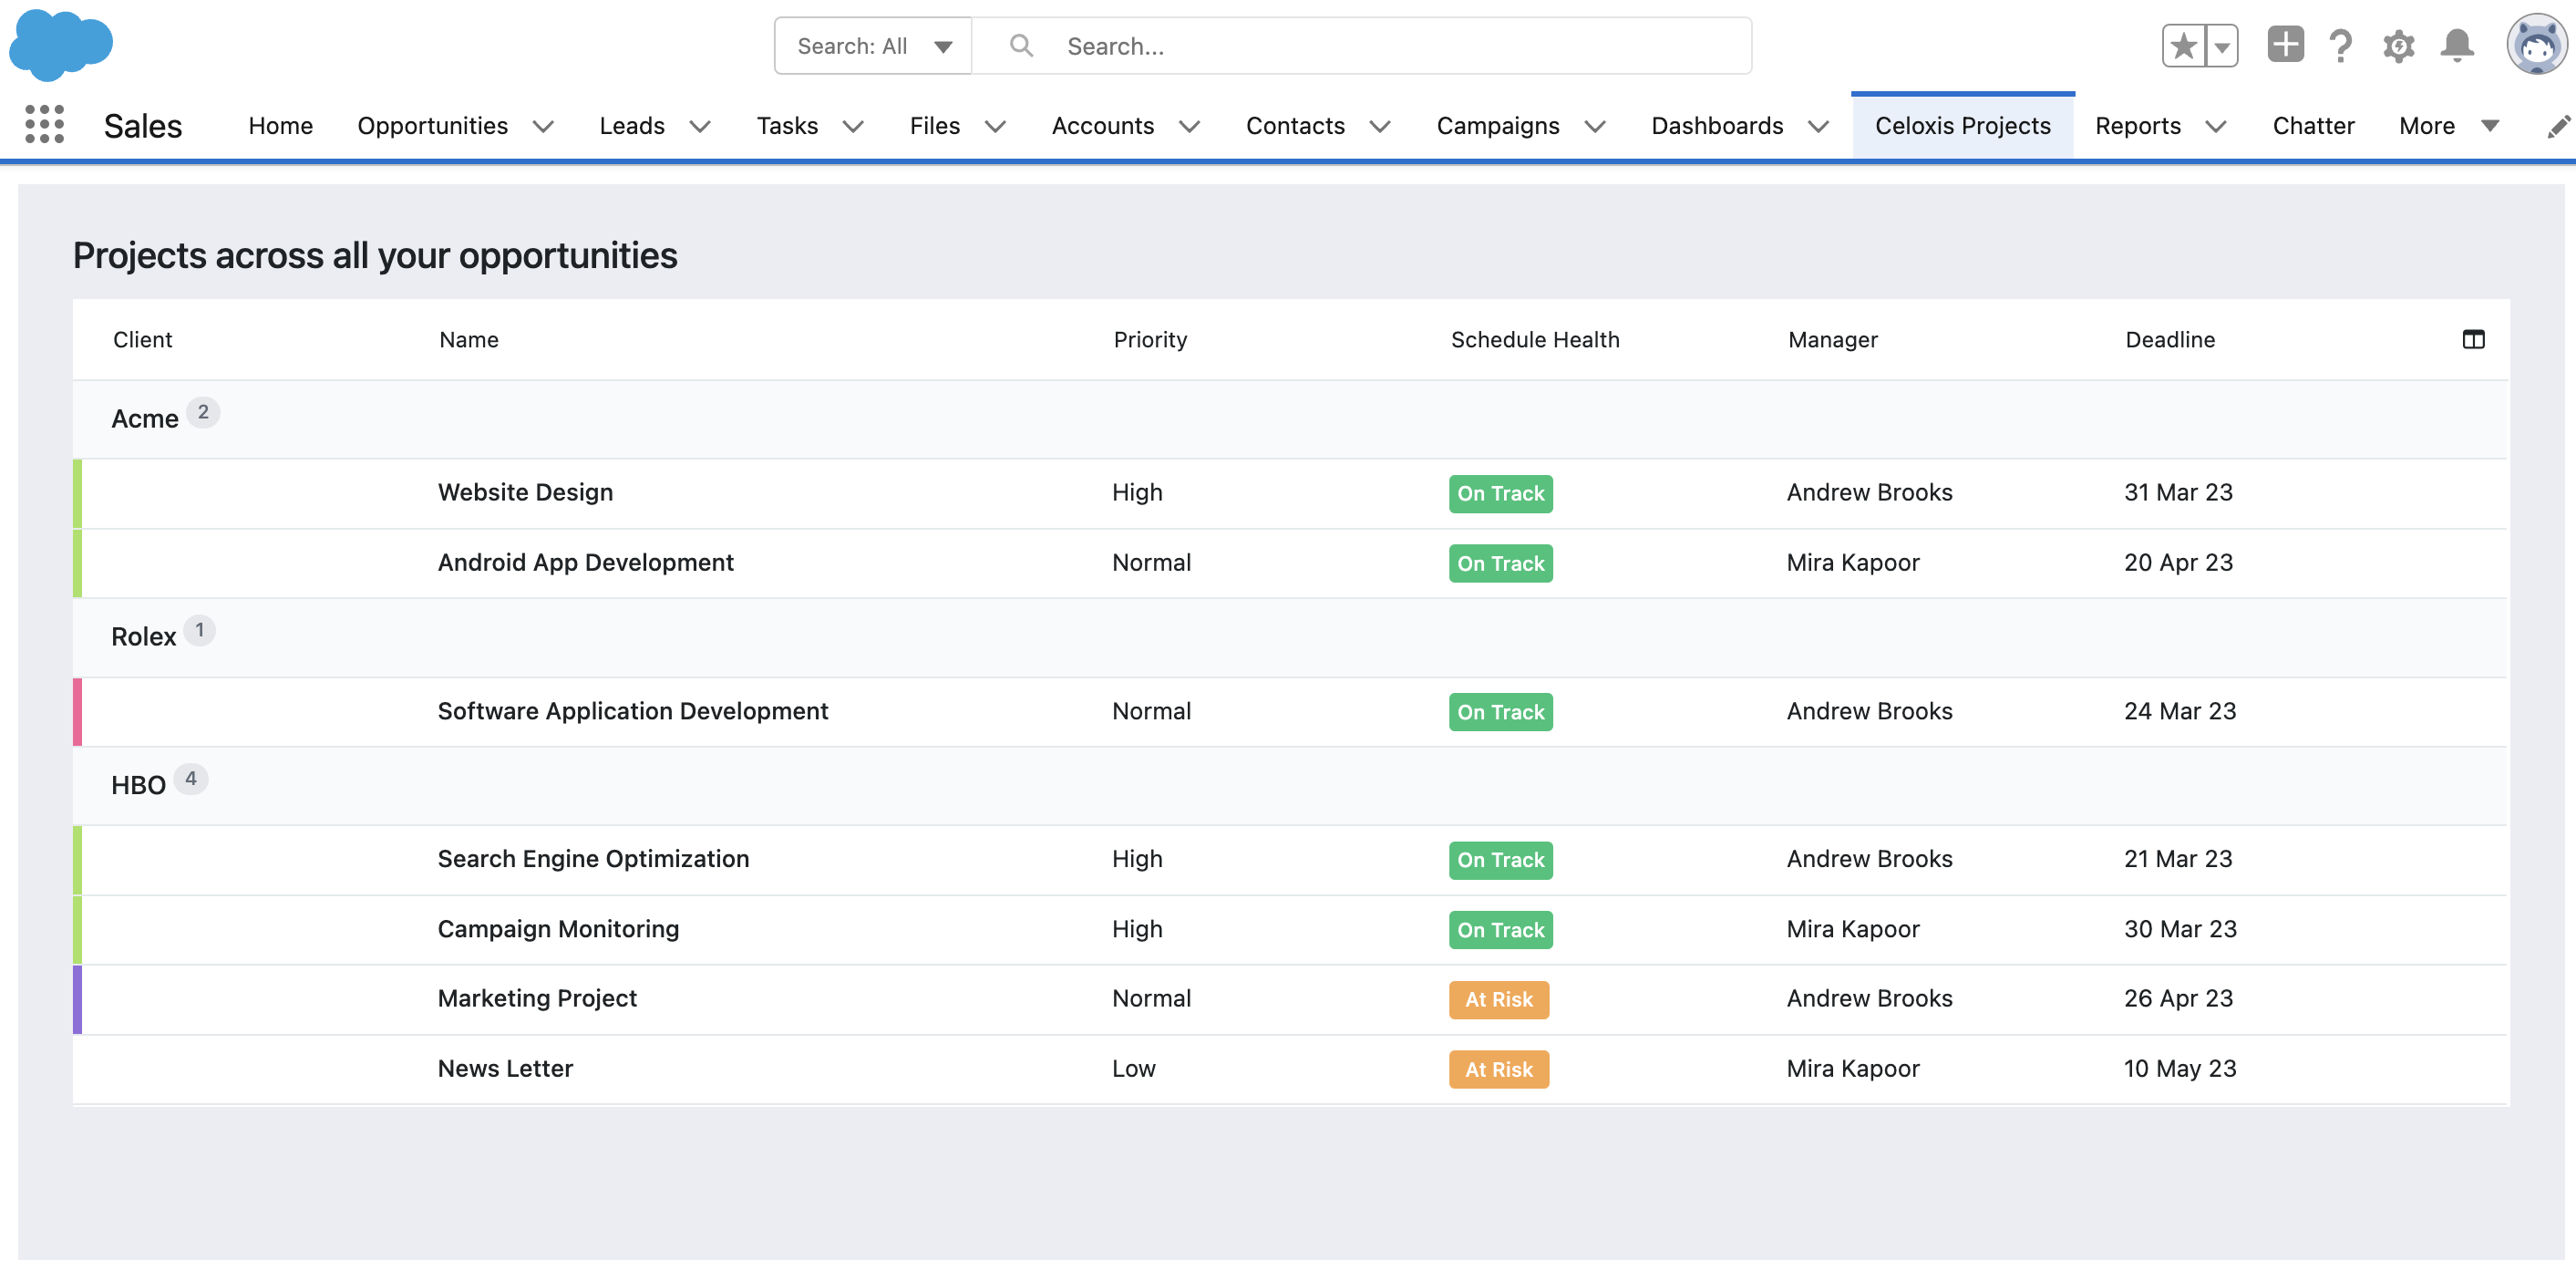
This integration allows sales representatives to create multiple Celoxis projects per Salesforce.com opportunity. In addition, there is a ‘Celoxis Projects’ Tab, which lists all Celoxis projects created across all opportunities for quick and aggregate viewing at the account/client level.
Setup
To setup this integration, you will need to create the following
- Create Custom buttons
- Add Project
- View Projects
- Customize the Opportunity Page
- Create Custom Web Tab: This is to track the progress of all projects across your accounts.
Create Custom Buttons
Add Project
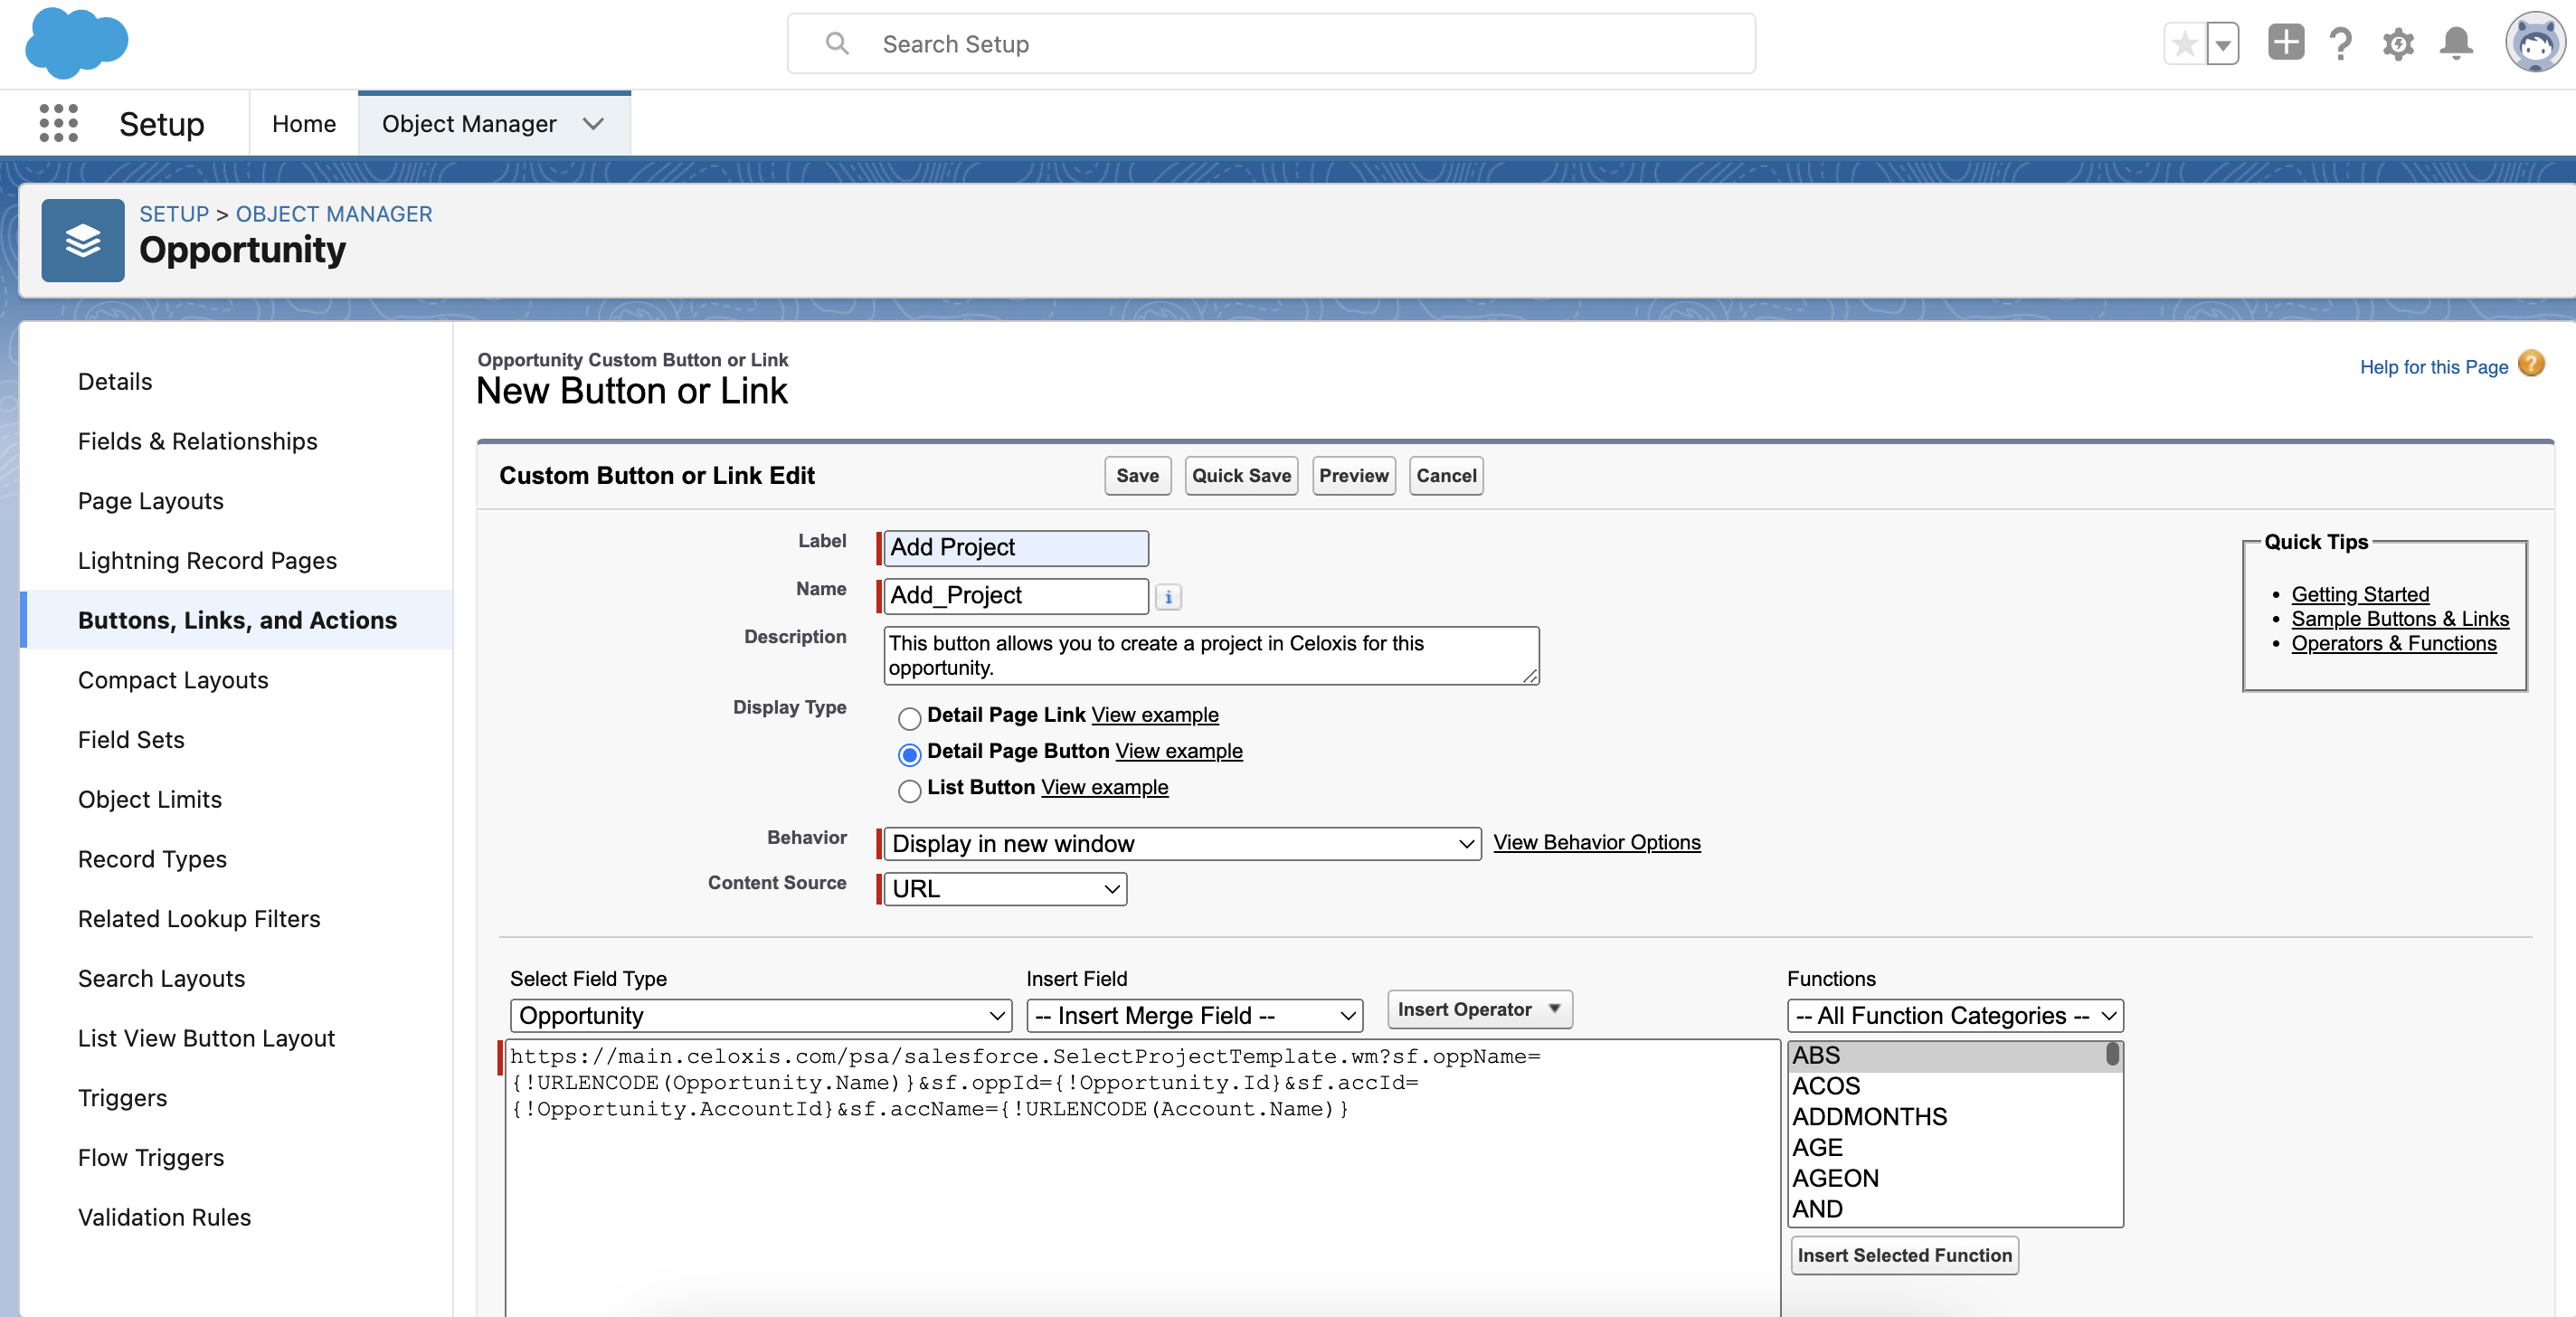
- Go to the Setup page.
- In the Platform Tools section, go to Objects and Fields -> Object Manager.
- Select the Opportunity object.
- Select Buttons, Links, and Actions.
- Click on New Button or Link
- In the New Button or Link pane, enter the following information:
- Label: Add Project
- Name: Add_Project
- Description: This button allows you to create a project in Celoxis for this opportunity.
- Display Type: Detail Page Button
- Behavior: Display in new window
- Content Source: URL
- URL: Pass the following parameters: Opportunity ID, Opportunity Name, Account ID and Account Name.
SaaS customers need to enter URL asUrl encode the Opportunity Name and Account Name.
https://app.celoxis.com/psa/salesforce.SelectProjectTemplate.wm?sf.oppName={!URLENCODE(Opportunity.Name)}&sf.oppId={!Opportunity.Id}&sf.accId={!Opportunity.AccountId}&sf.accName={!URLENCODE(Account.Name)}
On-Premise customers need to enter URL as
https://<servername:portnumber>/psa/salesforce.SelectProjectTemplate.wm?sf.oppName={!URLENCODE(Opportunity.Name)}&sf.oppId={!Opportunity.Id}&sf.accId={!Opportunity.AccountId}&sf.accName={!URLENCODE(Account.Name)} - Click Save
View Projects
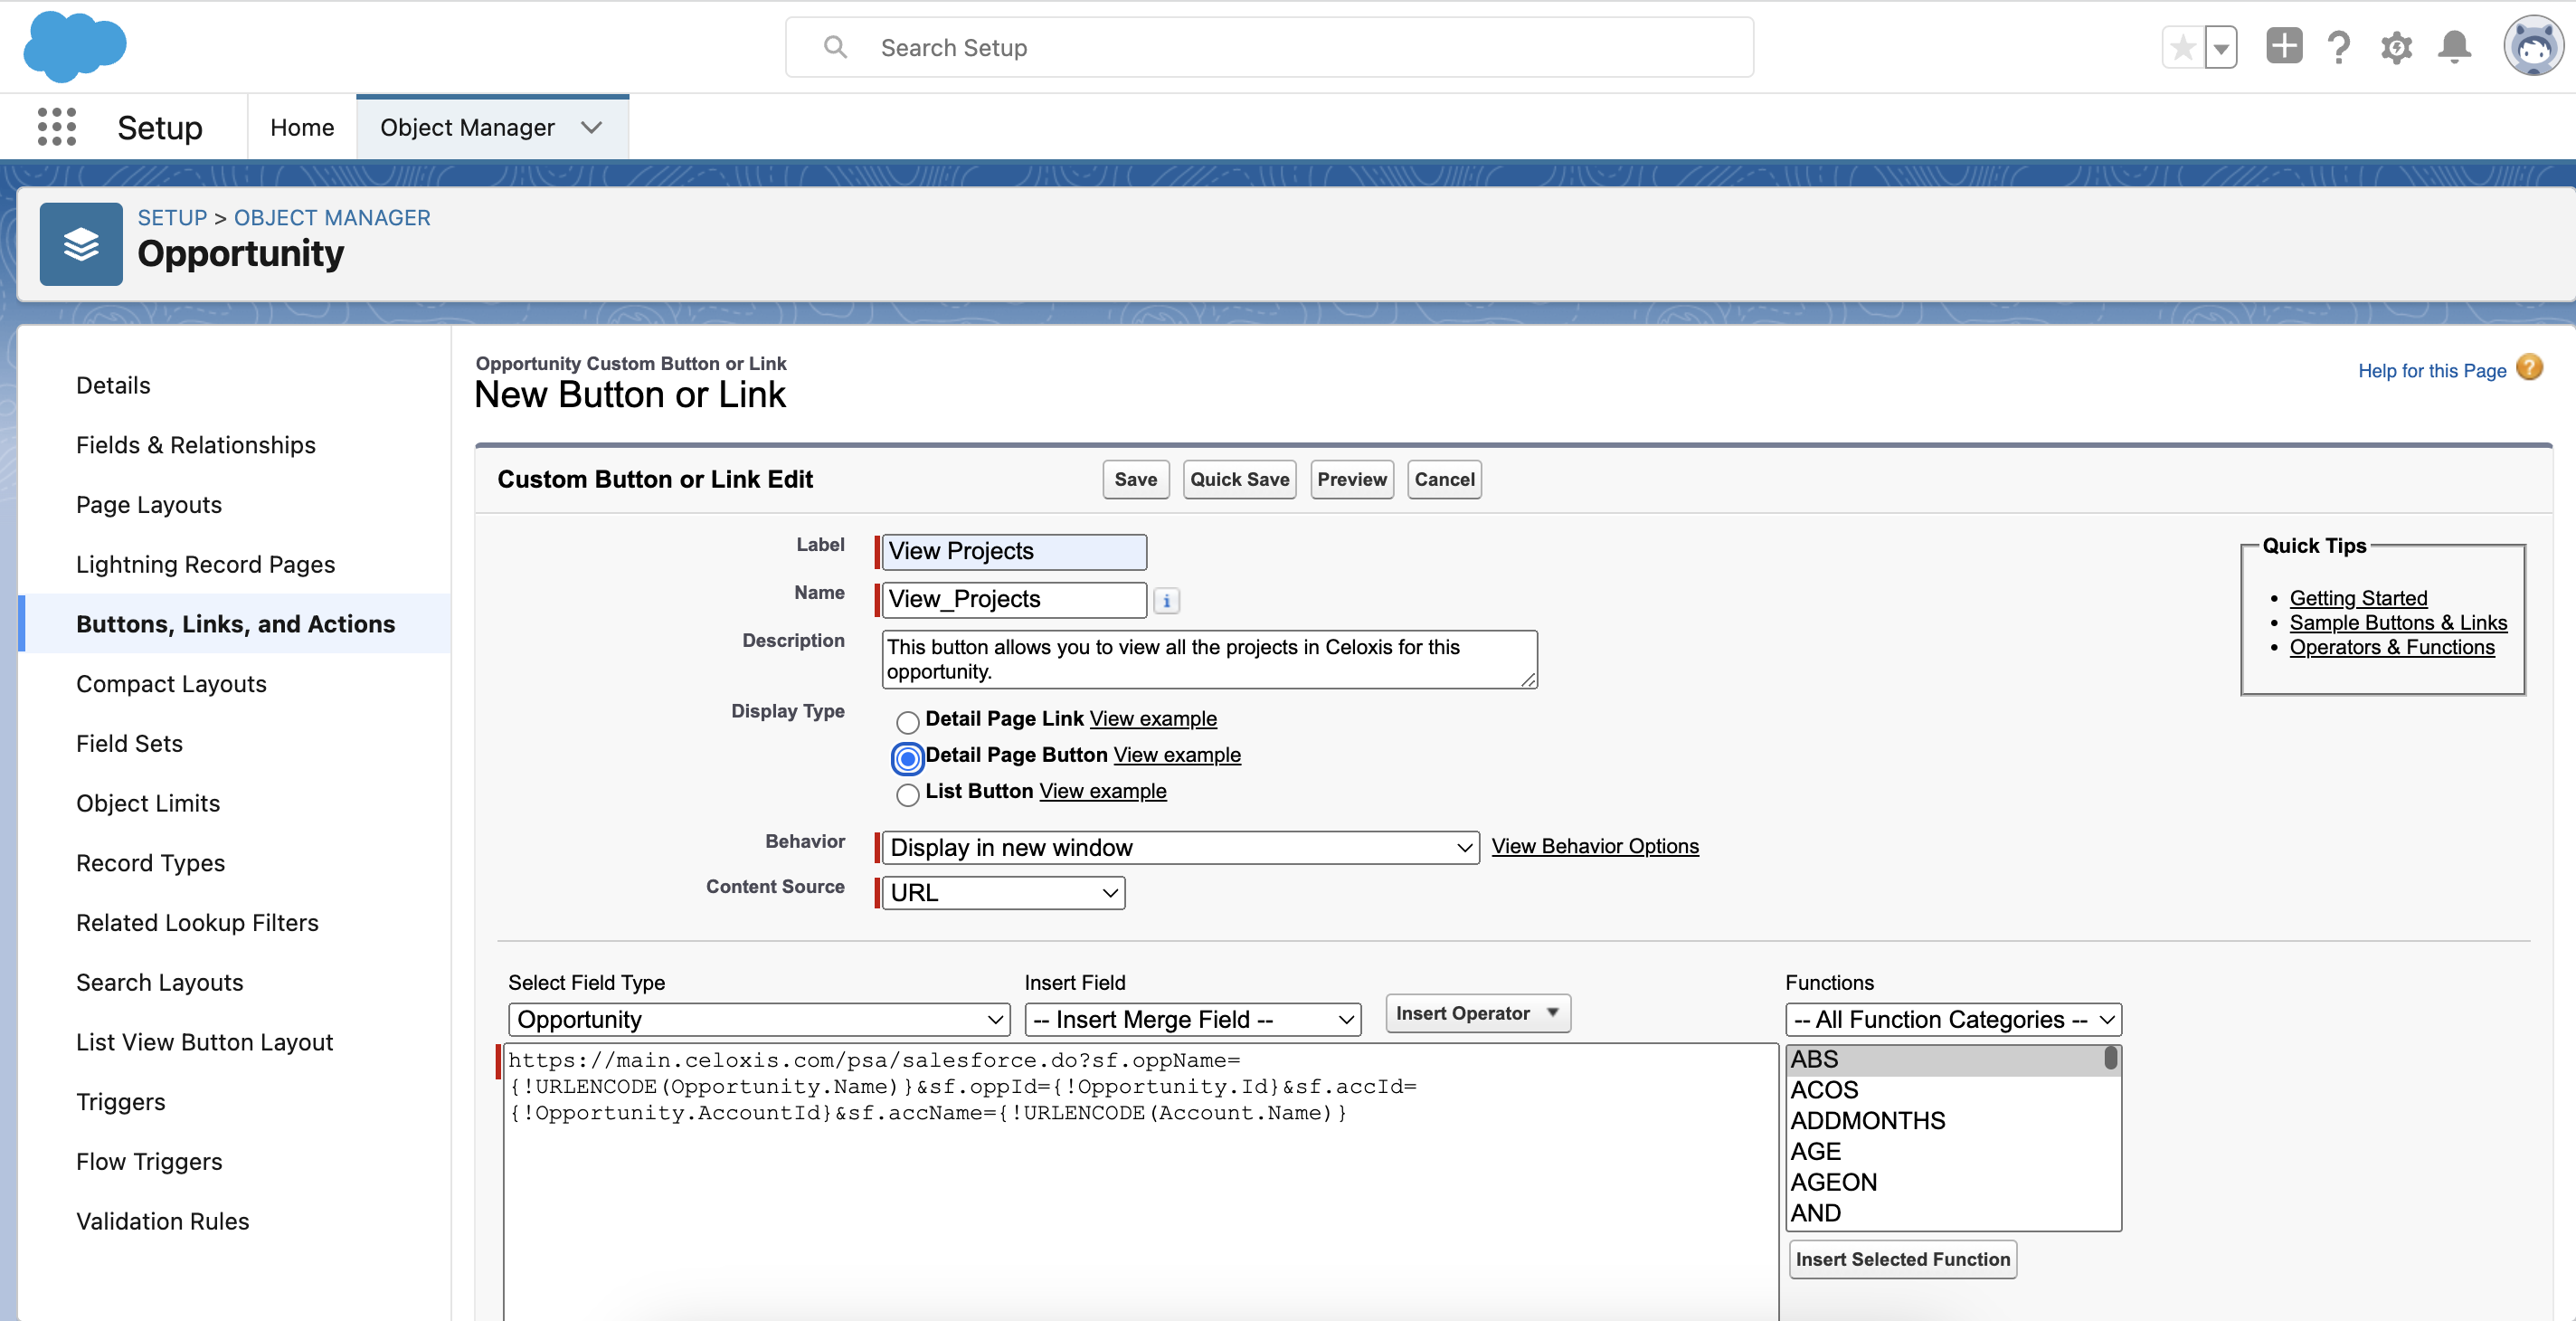
- Click on New Button or Link
- In the New Button or Link pane, enter the following information:
- Label: View Projects
- Name: View_Projects
- Description: This button allows you to view all the projects in Celoxis for this opportunity.
- Display Type: Detail Page Button
- Behavior: Display in new window
- Content Source: URL
- URL: Pass the following parameters: Opportunity ID, Opportunity Name, Account ID and Account Name. Url encode the Opportunity Name and Account Name.
SaaS customers need to enter URL as
https://app.celoxis.com/psa/salesforce.do?sf.oppName={!URLENCODE(Opportunity.Name)}&sf.oppId={!Opportunity.Id}&sf.accId={!Opportunity.AccountId}&sf.accName={!URLENCODE(Account.Name)}
On-Premise customers need to enter URL as
https://<servername:portnumber>/psa/salesforce.do?sf.oppName={!URLENCODE(Opportunity.Name)}&sf.oppId={!Opportunity.Id}&sf.accId={!Opportunity.AccountId}&sf.accName={!URLENCODE(Account.Name)} - Click Save
Customize the Opportunity Page
Once all the custom buttons are created, customize the opportunity page layout to add these custom buttons.
- Go to the Setup page, by clicking on the Setup menu.
- Click on Object Manager.
- Click on Opportunities.
- Click on Page Layouts on the left-hand side.
- Create a new layout or use the existing layout
- Click on Buttons
- Drag the new buttons to the Custom Buttons section and Save
Create Custom Web Tab
- Go to the Setup page, by clicking on the Setup menu.
- On your left-side, under the Build section, click on Create and then Tabs.
- Under Web Tabs section, click on New button.
- Choose Tab Layout and click Next.
- Under Define Content and Display Properties, enter the following information:
- Tab Label: Celoxis Projects
- Tab Name: Celoxis_Projects
- Tab Style: Pick the icon of your choosing
- Click Next
- In the Button or Link URL field, enter the following URL
SaaS customers need to enter URL as
https://app.celoxis.com/psa/salesforce.do?action=all-projects
On-Premise customers need to enter URL as
https://<servername:portnumber>/psa/salesforce.do?action=all-projects
How it works
Once you have set up the custom buttons, you can then create and view projects in Celoxis via the Opportunities module in Salesforce.
Create a project for an opportunity
- Click on an existing Opportunity or Create a new one by clicking on New.

- Click on Add Project button
- The first time, you will be asked to authorize by entering your Celoxis credential.
- Upon logging in with the Celoxis credentials, you will see a pop up to select the Project Template from the available list.
- The Client drop-down will be automatically populated with the client (Account Name in Salesforce) if the client already exists in Celoxis.
Else, you are shown the option to create the client in Celoxis.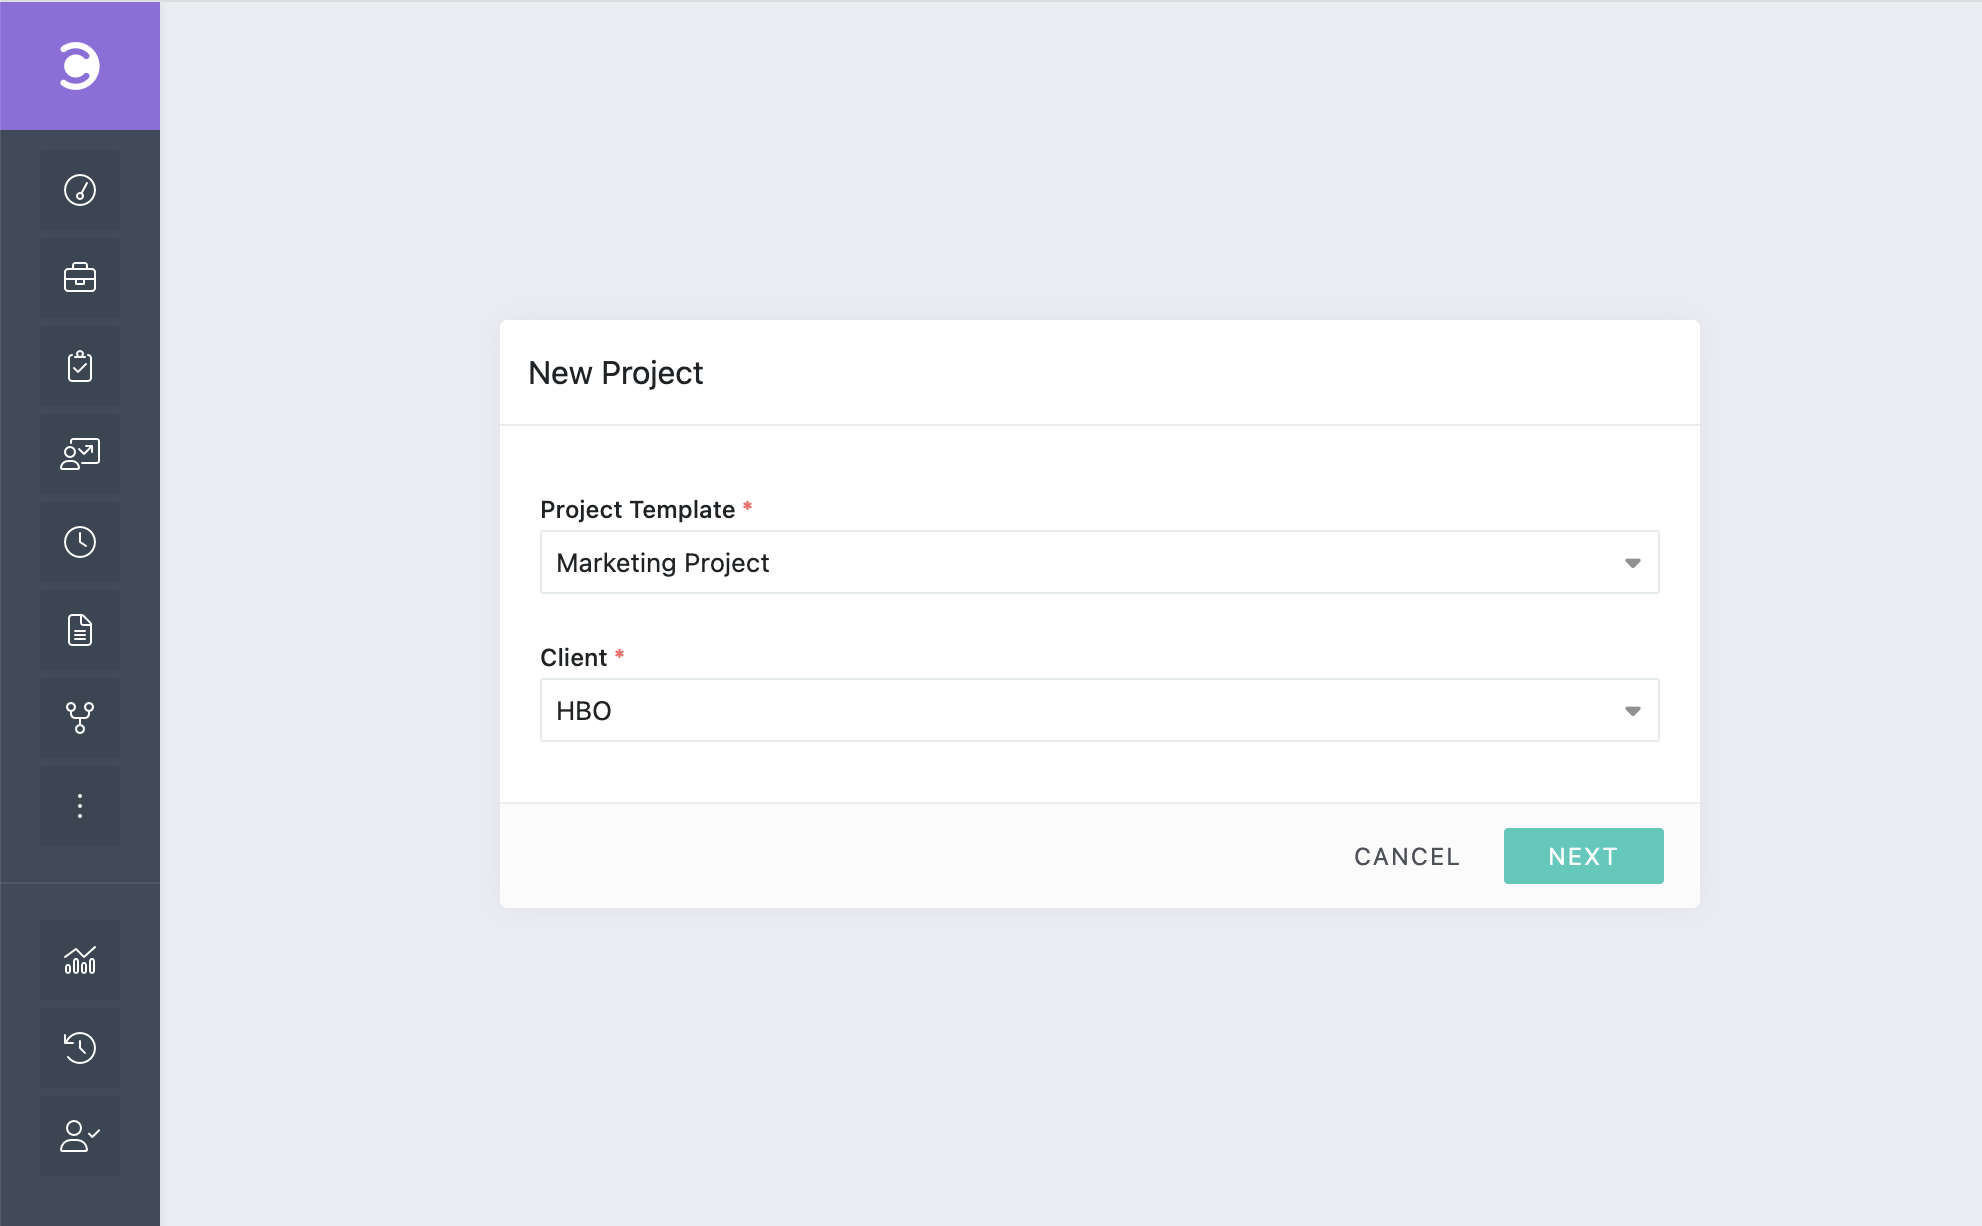
- Click on Next.
- On the Copy Project pop-up, Enter a new name or it will be auto-populated with opportunity name as entered in Salesforce.
- Select the Manager, Start Date, and the State of the project as required.
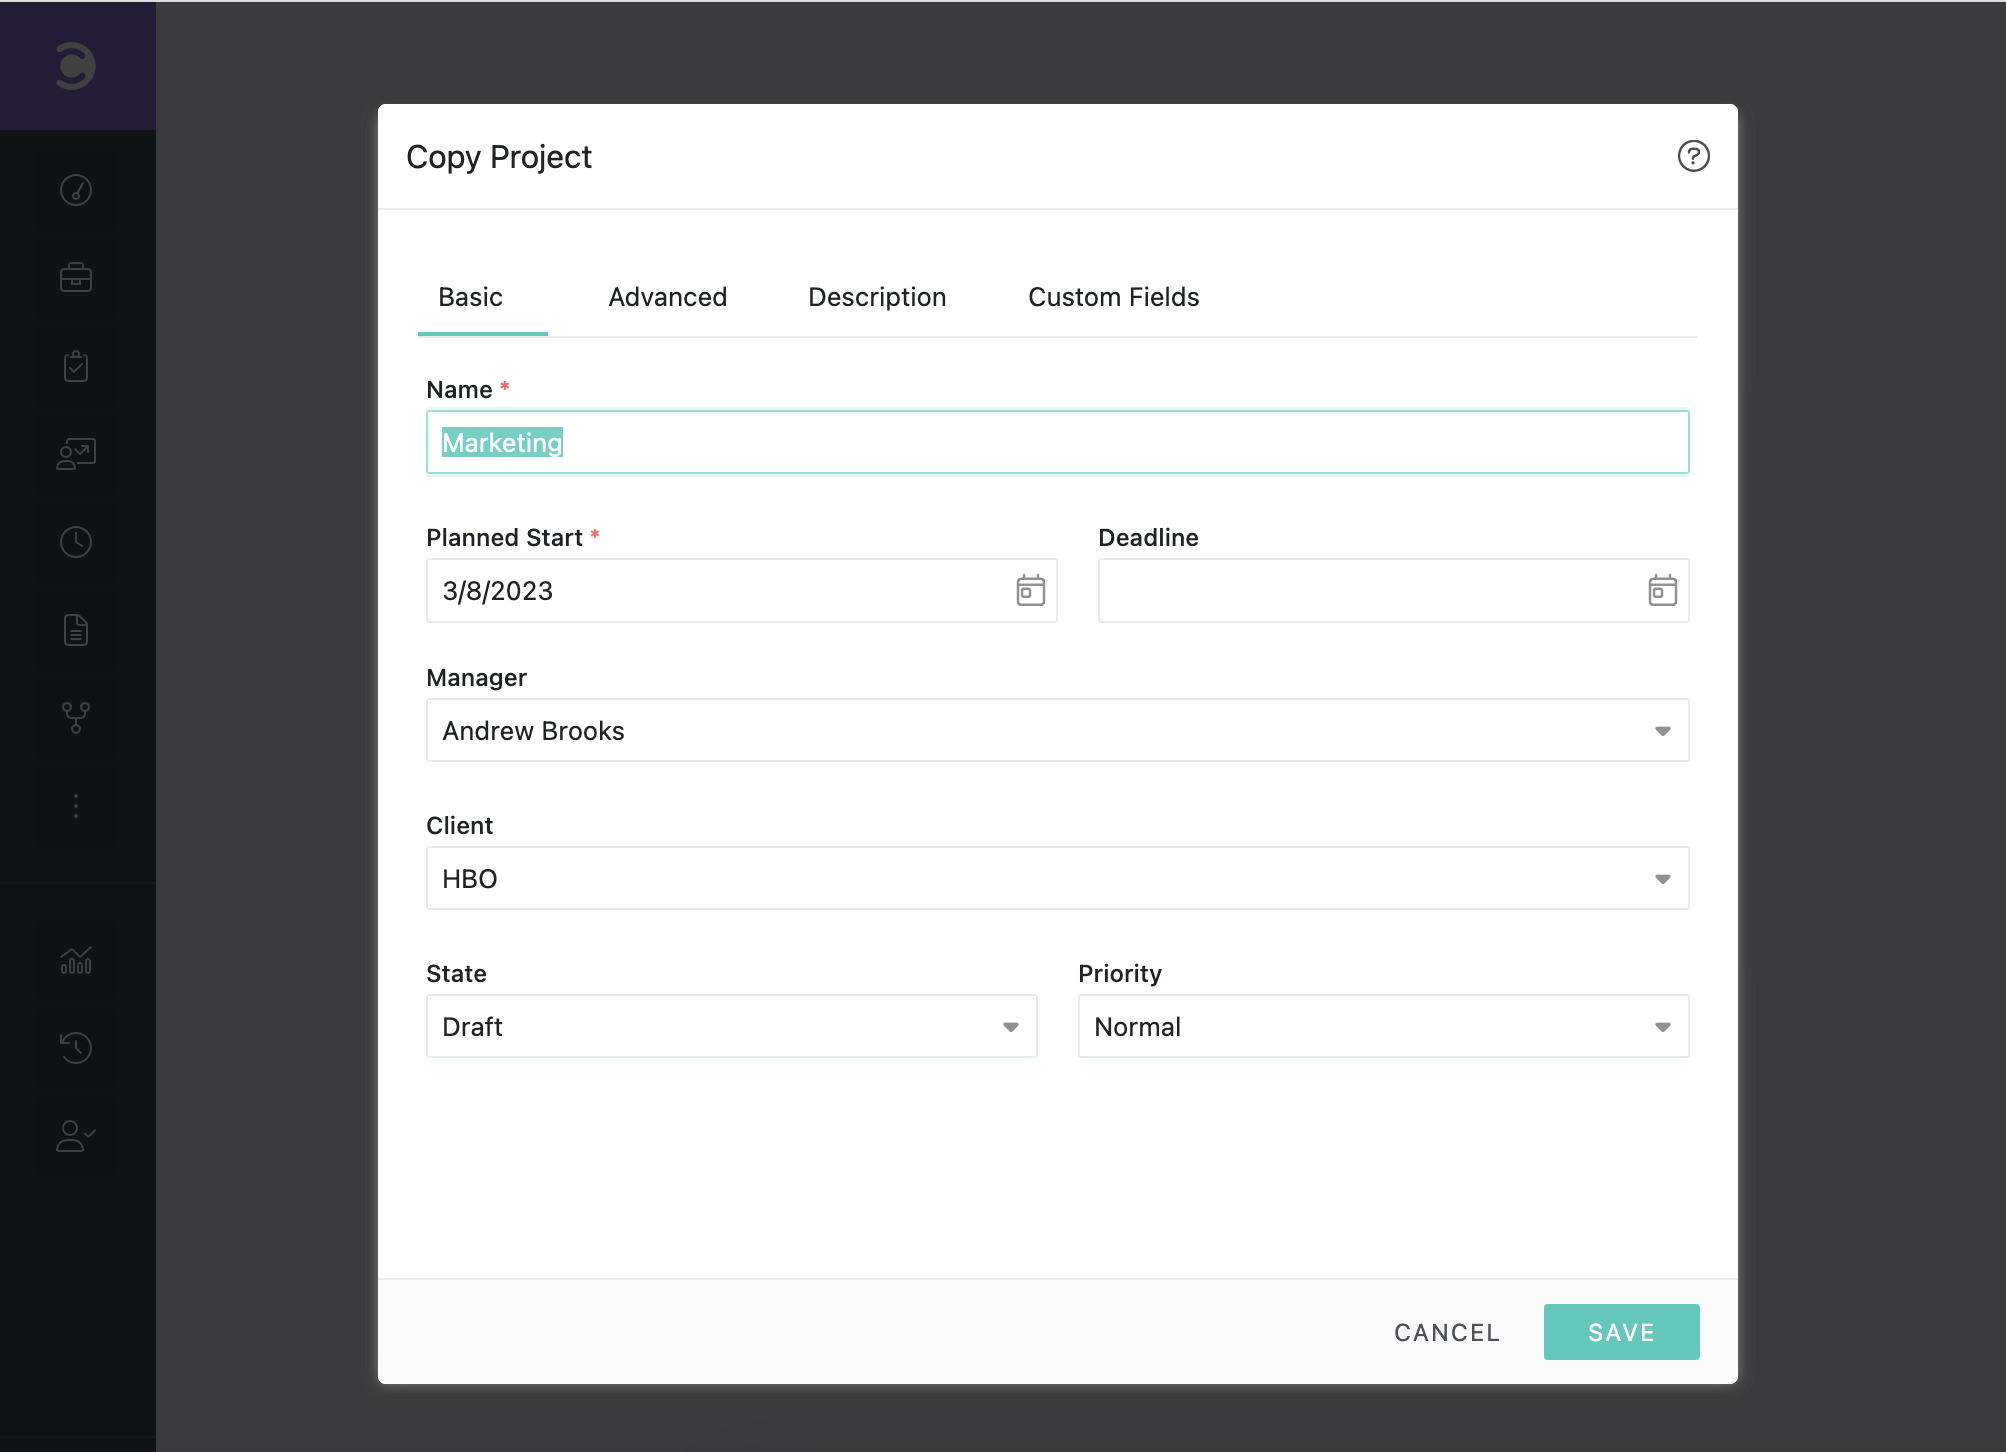
- On the same pop-up, under the Custom Fields tab, a custom field: SF Opportunity Id is shown which has the same ID of the opportunity in Salesforce. This helps in mapping.
The SF Opportunity Id custom field is used for when mapping the projects to be displayed for the particular opportunity in Salesforce.Modifying SF Opportunity Id custom field is not recommended. - A new project is created in Celoxis and the Overview page of the project is displayed.
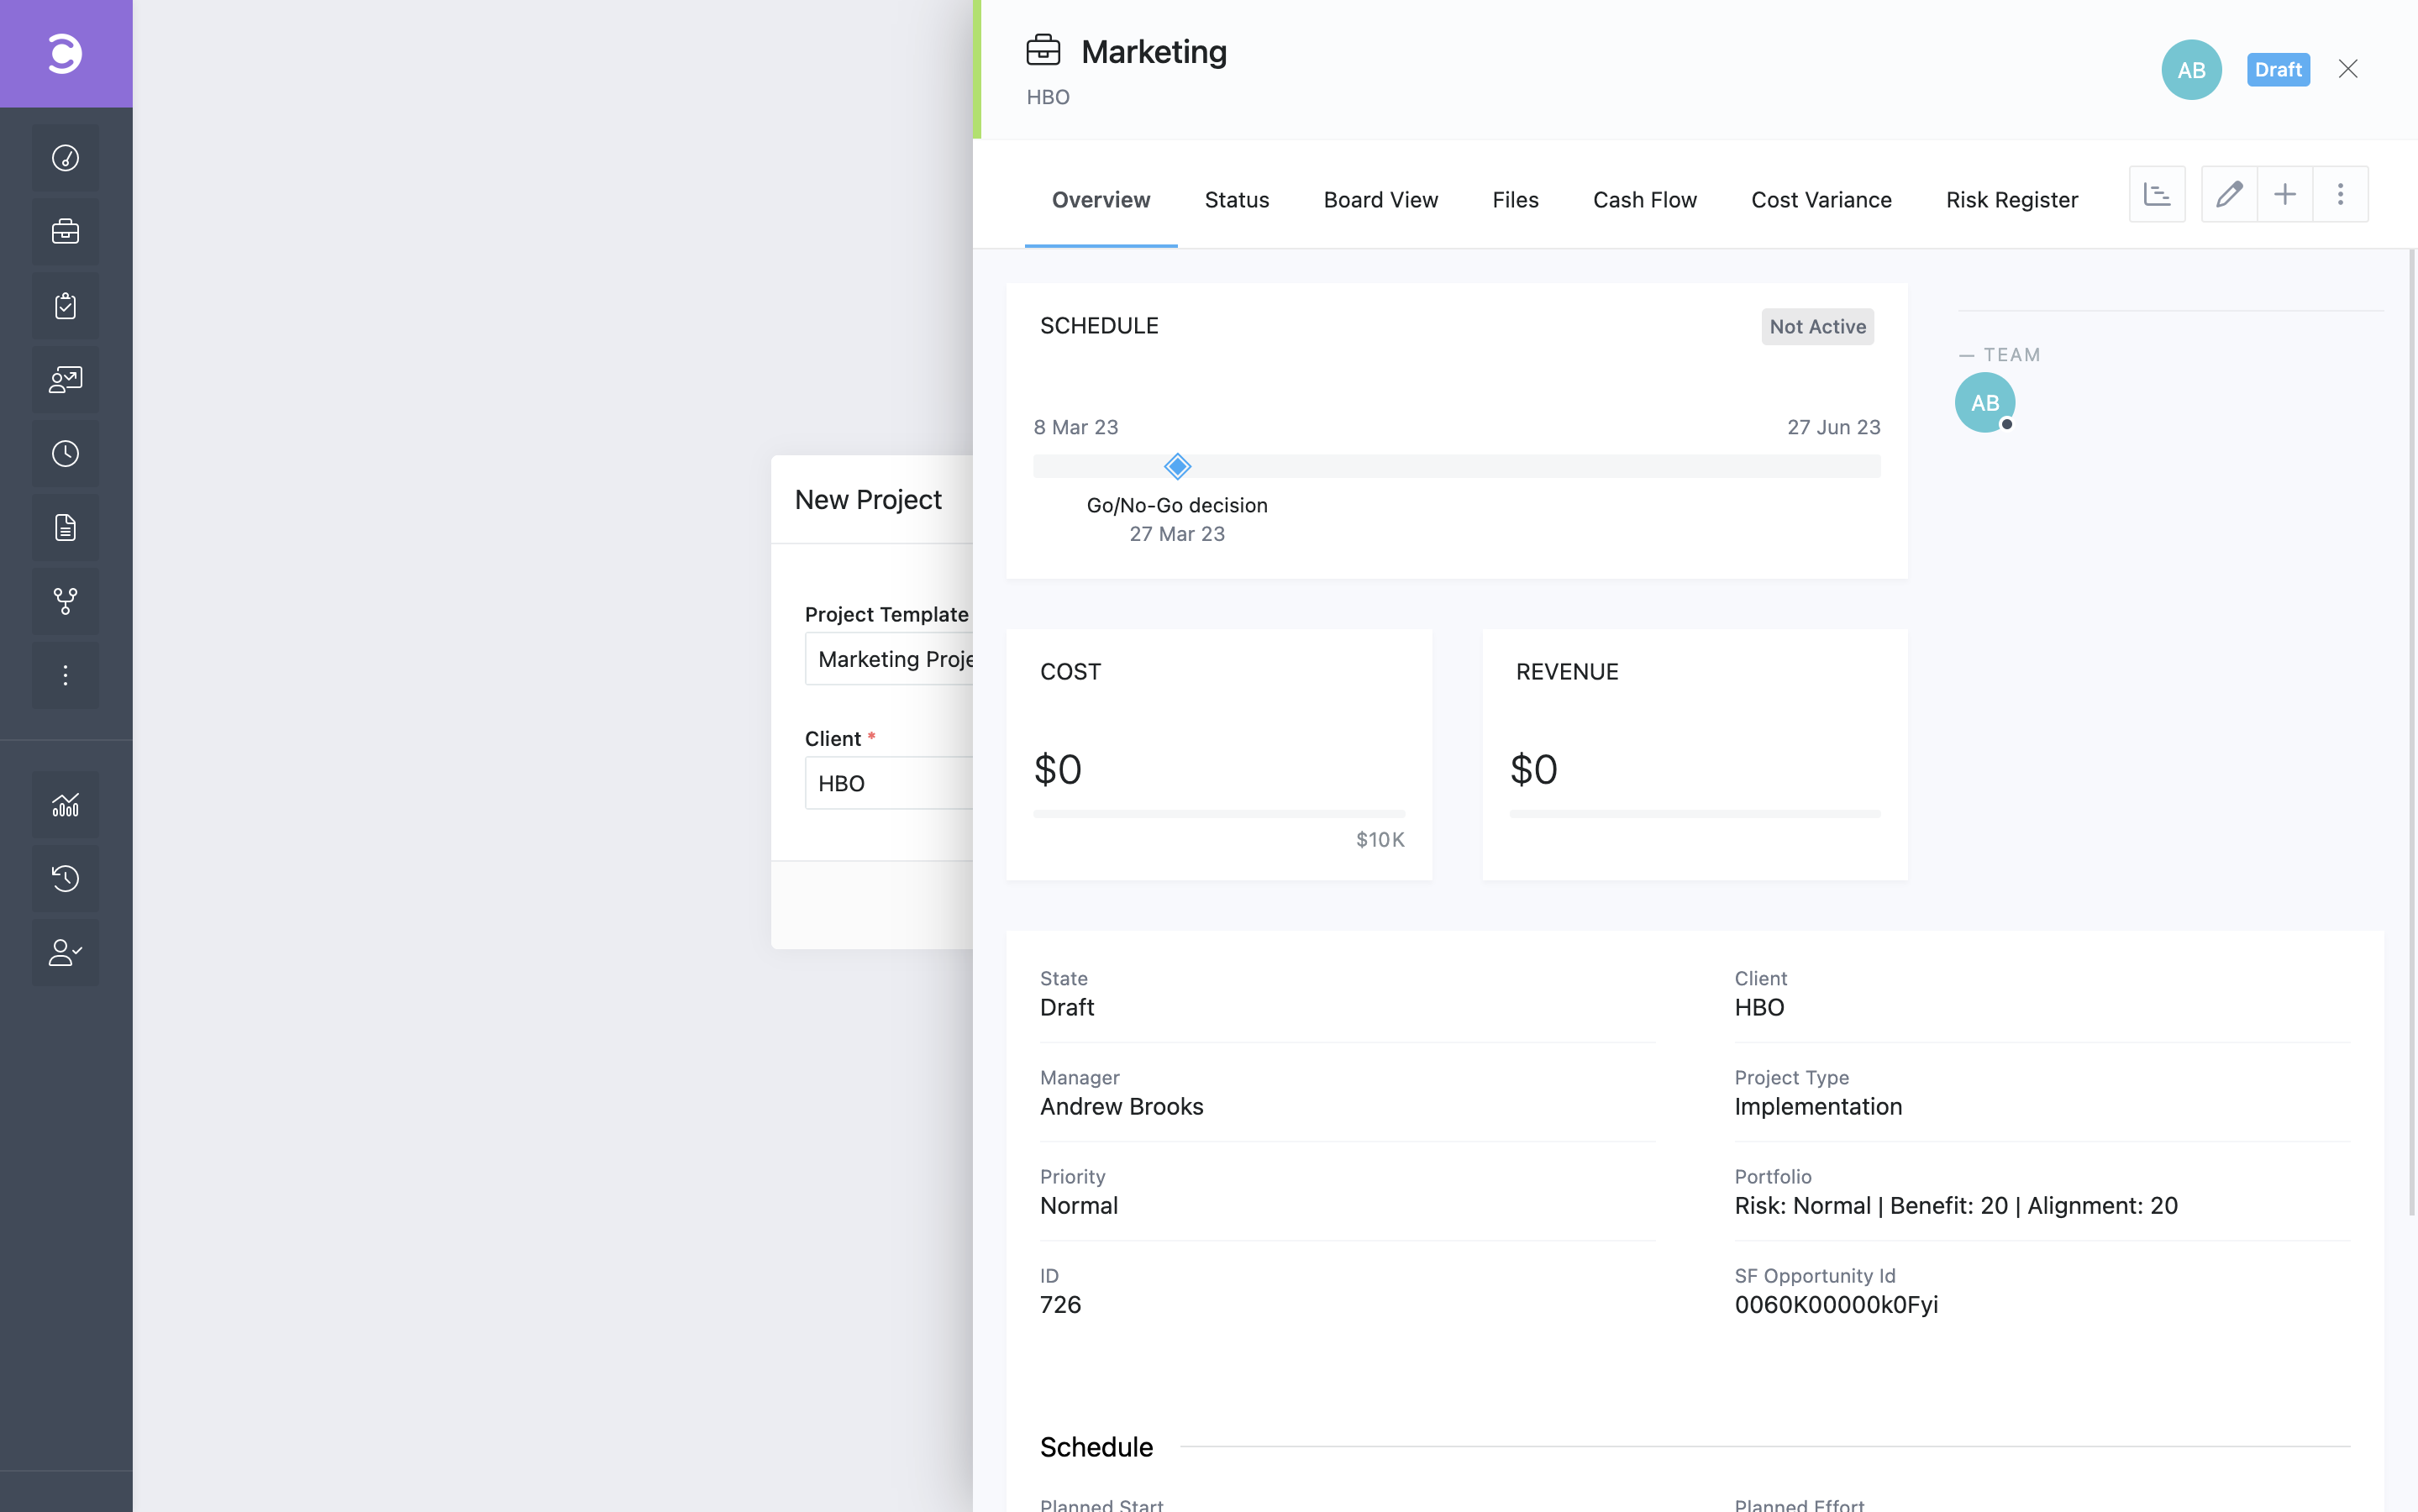
View Projects for an opportunity
- Click on an existing Opportunity.
- Click on View Projects button
- The Name of the project is clickable. Clicking on the Name will show the project overview.
Reports
You can customize your view to see the projects you have created in Celoxis via Salesforce by clicking on the + sign and then click on Customize My Tabs.
By default, the projects where you are the creator will be shown in the report. The Name of the project is clickable. Clicking on the Name will show the project overview.
