Client Approval
In many organizations, some part of the project work often needs to be formally approved by the client once completed. Each organization may have their own approval process that dictates how this project work should be approved. Celoxis helps you set up this approval process and customize it as per your requirements. In this document we will see how to setup and use this approval process in Celoxis.
Follow the steps:
- Create a custom field with options to depict the stages of the approval process
- Select the completed tasks that needs to be reviewed by the client
- Create a kanban report based on the custom field and share it with the clients to approve or reject the tasks
- Add the Kanban report on the Client Dashboard
- Approval process in Action
- Tracking tasks status
Create a Custom Field
- Login as an administrator user and click on {{nav:ADMIN > AccountManagement > CustomFields}.
- Click on the + Add button > Single-Select Drop Down
- Basic Tab
- Name: Task Approval
- Options: Pending Approval, Approved, Rejected.
- Colors: You can set the colors as required. This is an optional step.
- Attached To: Task
- Click Save
Select tasks that needs to be reviewed
- On the side menu, click on Main Menu ▸ Tasks
- Select all the completed tasks that need to be reviewed by the client
- Click on the Bulk Action > Edit
- Select the Task Approval, and set the option to Pending Approval
Create a Kanban Report
- Go to Main Menu ▸ Reports ▸ All Reports
- Click on the button and select Task
- Details Tab
- Name: Approve Tasks
- Visible to Users: All
- Visible to Clients: All
- Filters Tab
- Display Tasks: Completed
- Task Approval: Pending Approval, Approved, Rejected
- Output Tab > Card
- Attribute: Task Approval
- Sort By: As per your requirement
- Select the option: Allow clients to drag-n-drop
- Click Save
Add the Kanban Report on the Client Dashboard (Optional)
- Go to Main Menu ▸ Reports ▸ All Reports
- Search for the Client Dashboard
- Add the Approve Tasks report to Client Dashboard
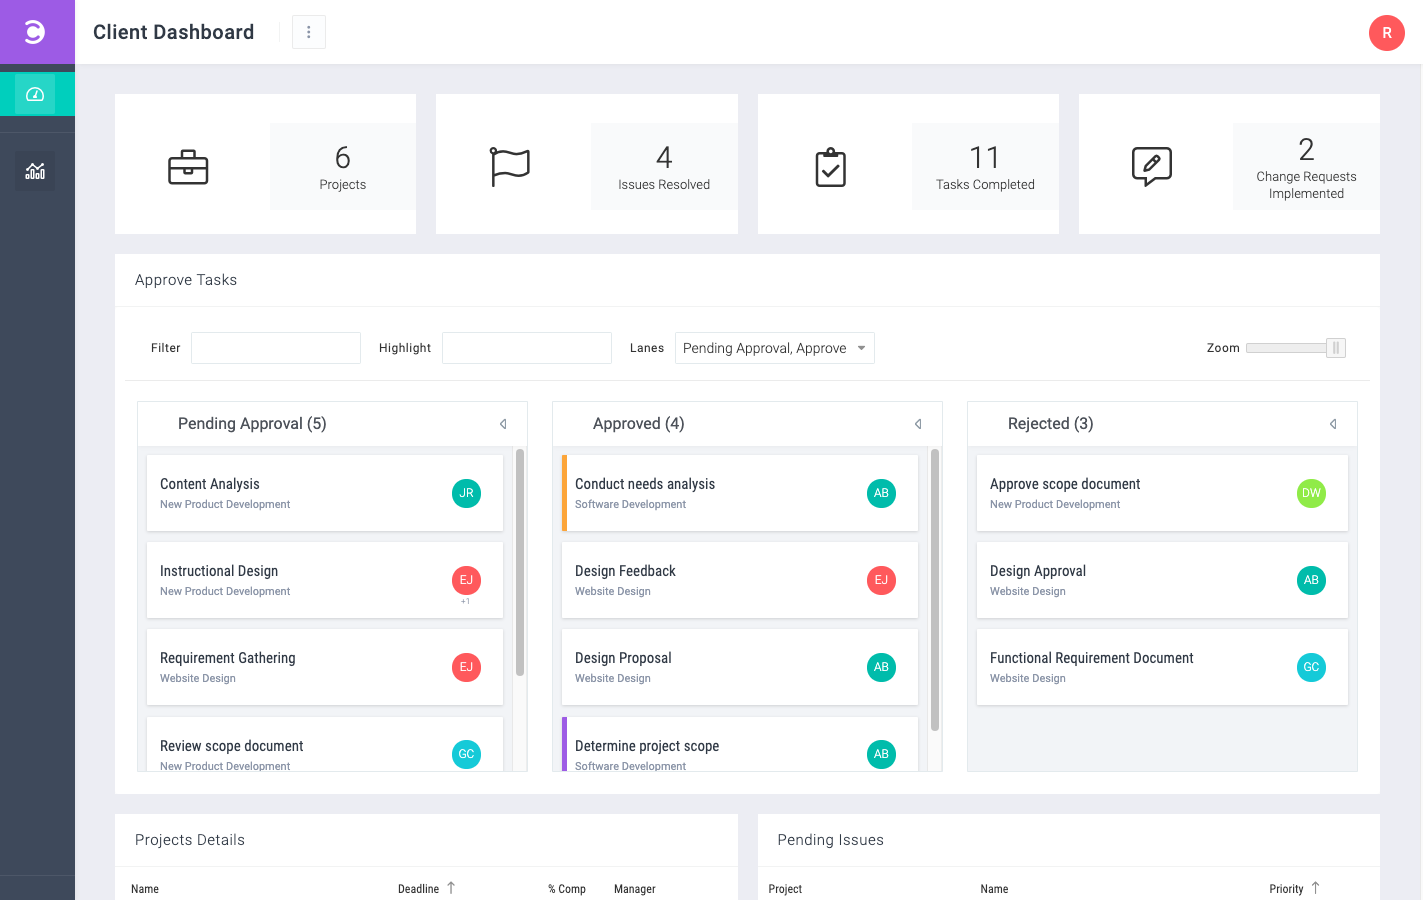
Approval process in Action
- Login as a Client
- In the Approve Tasks report on the dashboard, drag and drop tasks across lanes to approve or reject
- For adding the approve or reject comments, click on the task and add your comment in the comment box.
- Here is the sample report
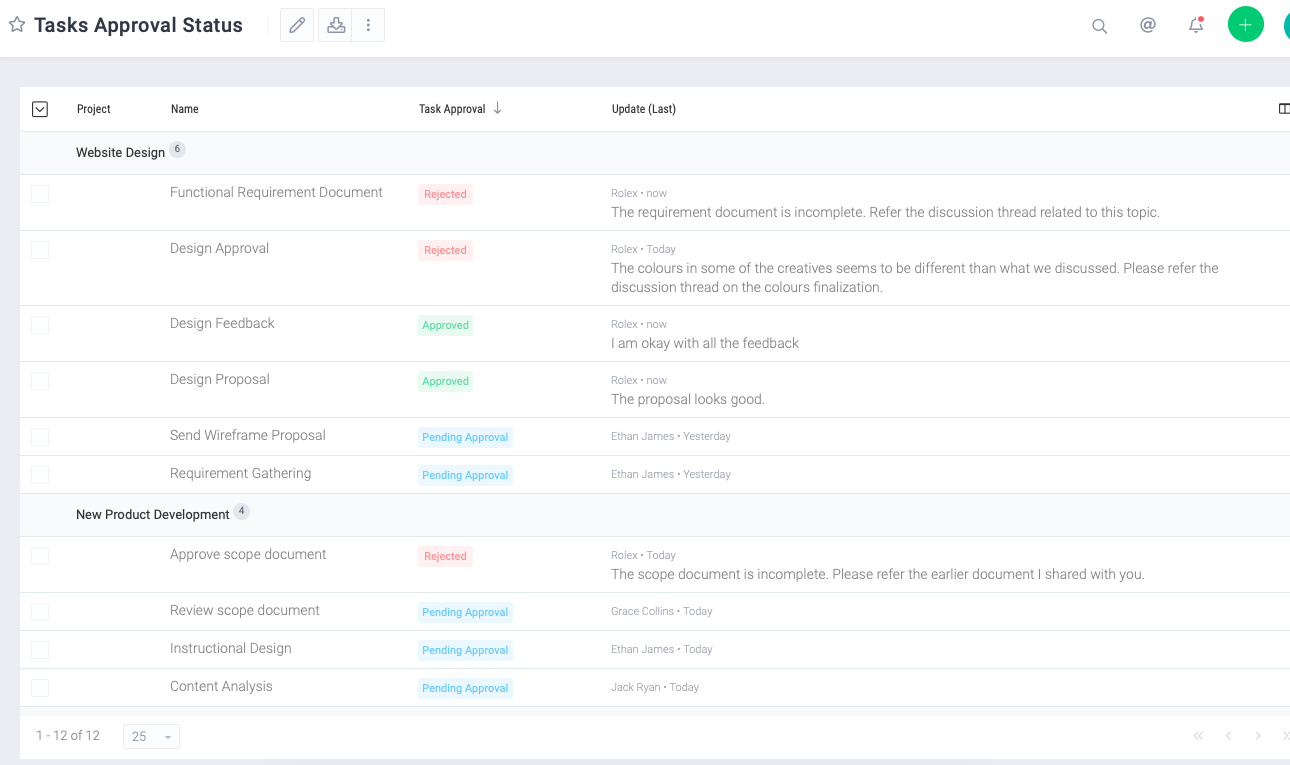
Tracking tasks status
- Login as Manager
- Go to Main Menu ▸ Reports ▸ All Reports
- Click on the button and select Task
- Details Tab
- Name: Tasks Approval Status
- Visible to Users: All
- Filters Tab
- Display Tasks: Completed
- Task Approval: Pending Approval, Approved, Rejected
- Output Tab > Tabular
- Columns: Name, Task Approval, Update (Last)
- Sort By: As per your requirement
- Group By: Project
- Click Save
- Here is the sample report