We shall learn about building custom apps through an example. We will build a simple bug tracking application. We shall assume we have two teams: Developers - they fix bugs, and QA (short for Quality Assurance) - they test the fixes by developers. We will to the model the following bug workflow:
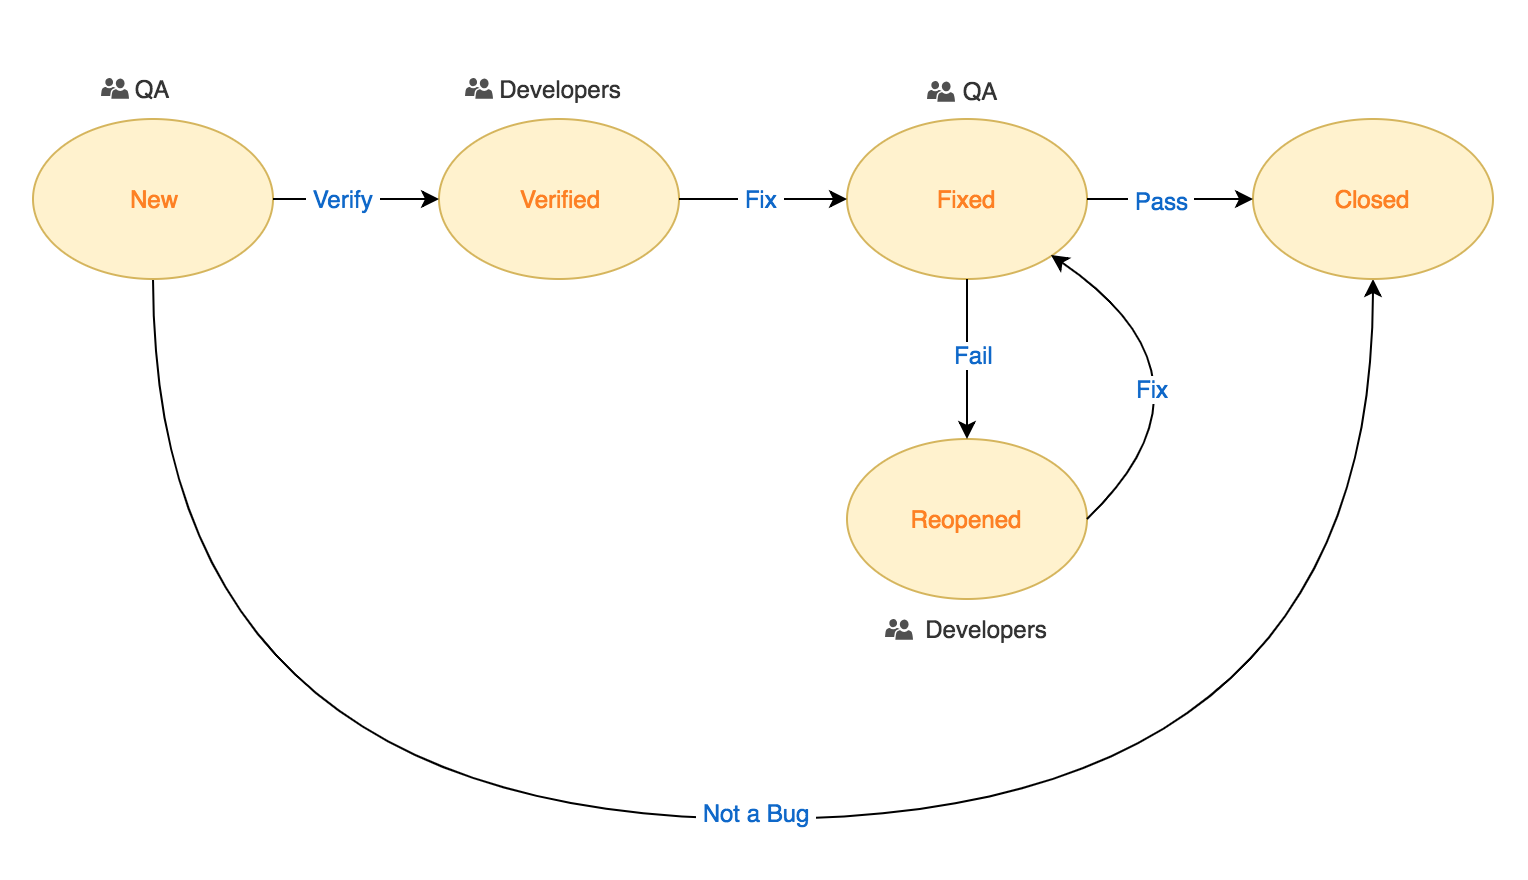
In plain english, the diagram translates to:
- When a bug is reported, it is in the New state.
- QA verifies the bug. If it is not a bug, the bug moves to Closed; else to the Verified state.
- A verified bug fixed by a developer moves to the Fixed state.
- The fix is then tested by QA and the bug moves to Reopened, if test fails; or Closed, if the test passes.
- A Reopened bug fixed by the developer moves to the Fixed state.
We, ourselves use our own bug tracking application but we have a lot more states to indicate whether a test case was present, if documentation was updated, if a test case was added, etc. Similarly you can make the workflow as complex or simple as you like. But for now, let's stick to the simple workflow that we discussed above.
Creating an App
To create an app, go to Top Menu ▸ ▸ Admin ▸ Custom Apps ▸ Apps and click on Add. You will see a form with many tabs. We will cover each tab below.
The Basic tab
This tab defines some basic properties of the app. In addition, it also controls certain behaviours of the app.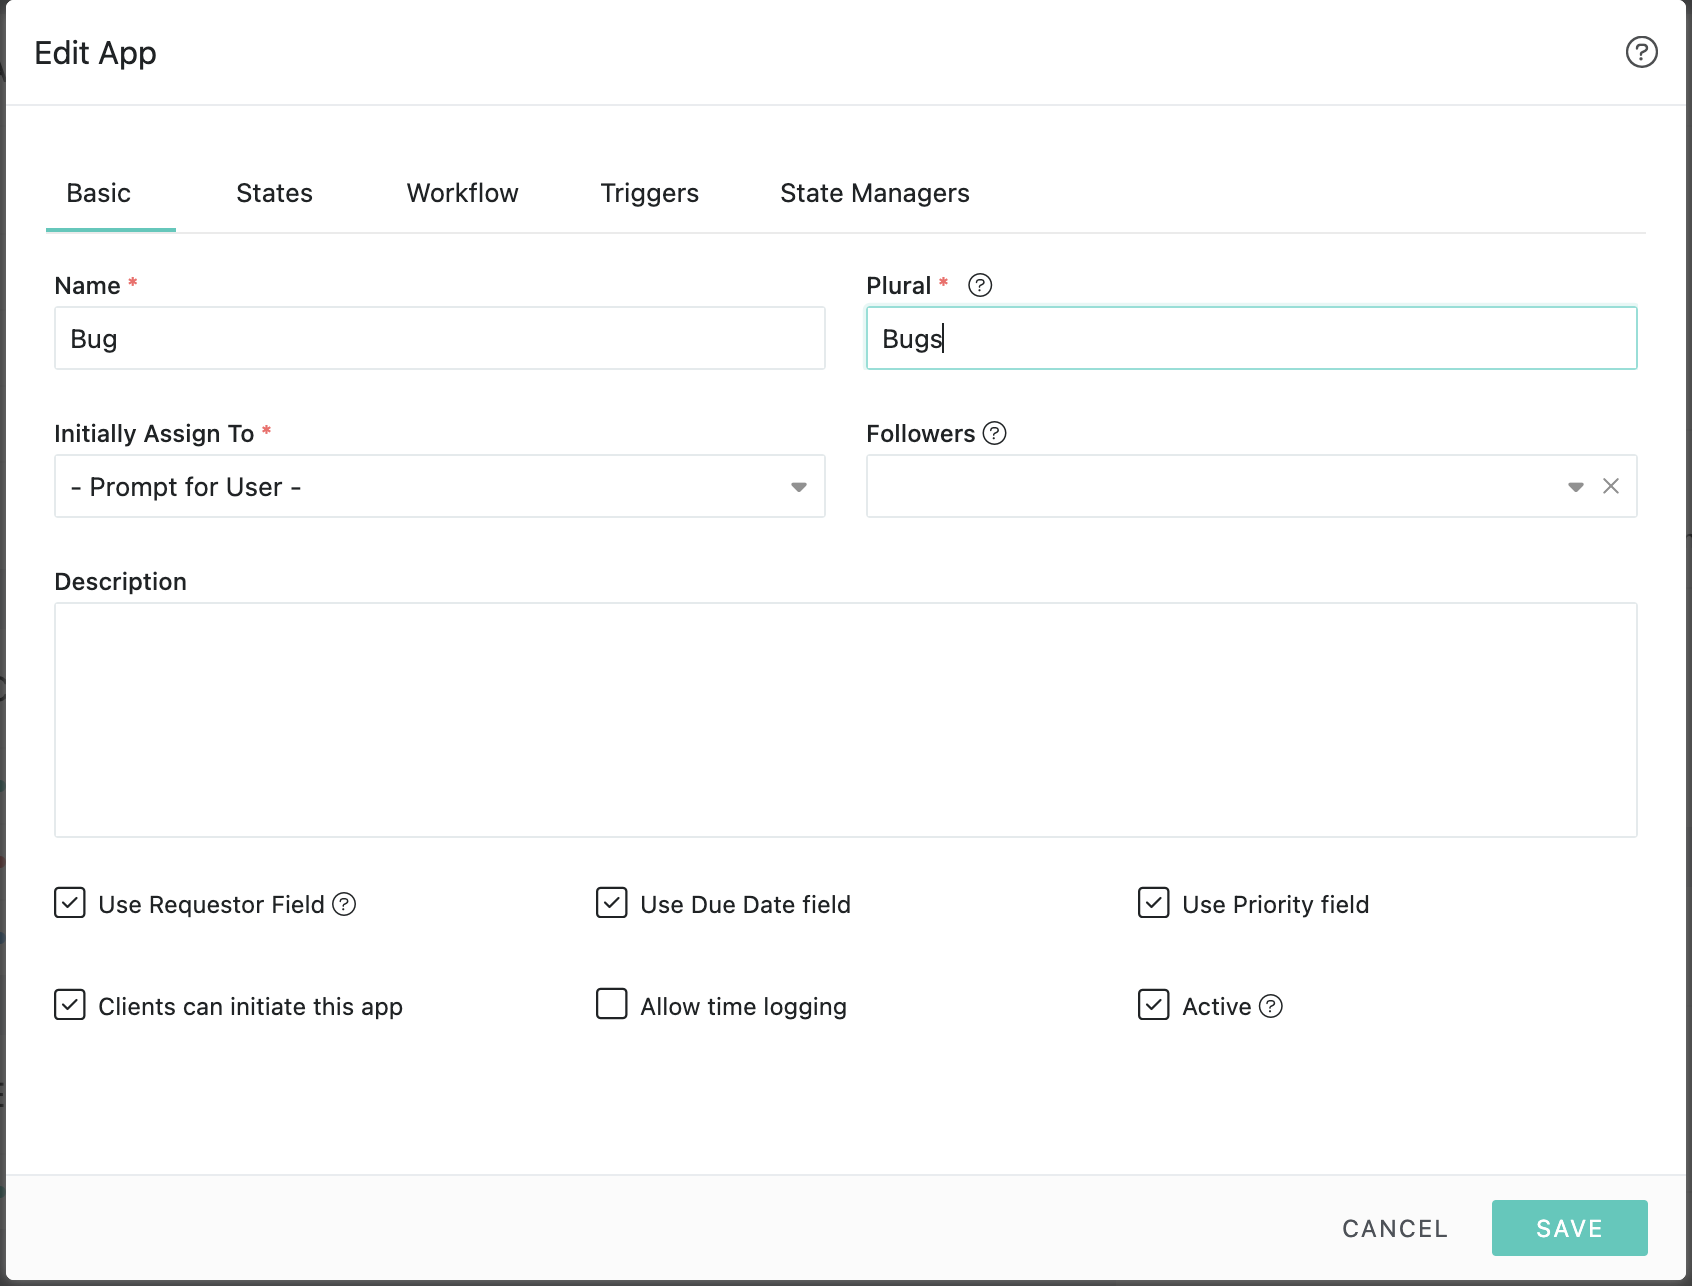
| Name | The name of your app. We will put Bug here. |
| The plural name for the name. | |
| Select the user who will be automatically assigned to new instances. | |
| By default the creator of an app item is also the requestor for that app item. However, there could be cases where you would want to initiate an app on someone else's behalf and have notifications and updates sent to that person and not the creator. In our app, we would want our support agents to be able to open bugs on behalf of a customer, but we would like updates to be sent to the customer. So we turn it on. When enabled, you will see a Requestor field on while creating a new instance of an app. | |
| This option determines whether to enable or disable the due date field on the Add/Edit app item. Since we don't want to use the Due Date field, we check this option. | |
| This option determines whether to enable or disable the Priority field on the Add/Edit app item. Since we don't want to use the Priority field, we check this option. | |
| Whether to allow logging time on the app item. We would like our developers and QA team to log time, we so check this option. | |
| Whether you want your clients to create new instances. We would like our clients to report bugs, so we check this option. | |
| Description | A brief description for your app. |
| Followers | Select the default followers. Followers will receive notifications when there is reassignment, state change or new comments. |
| Whether to enable or disable your app. Marking it as inactive will not delete existing instances of that app. |
The States tab
This tab defines the states of the app. You can also mark the start and end states in the workflow. We have listed all the states in our bug workflow.
| Wen an app item is created, it is moved to this state. In our case it is New. | |
| When an app item moves to this state, the process is considered as finished. In our case it is Closed. |
The Workflow tab
This tab defines all the arrows in the workflow diagram. Each arrow represents an end-user action. We shall see more about its usage later on in the documentation.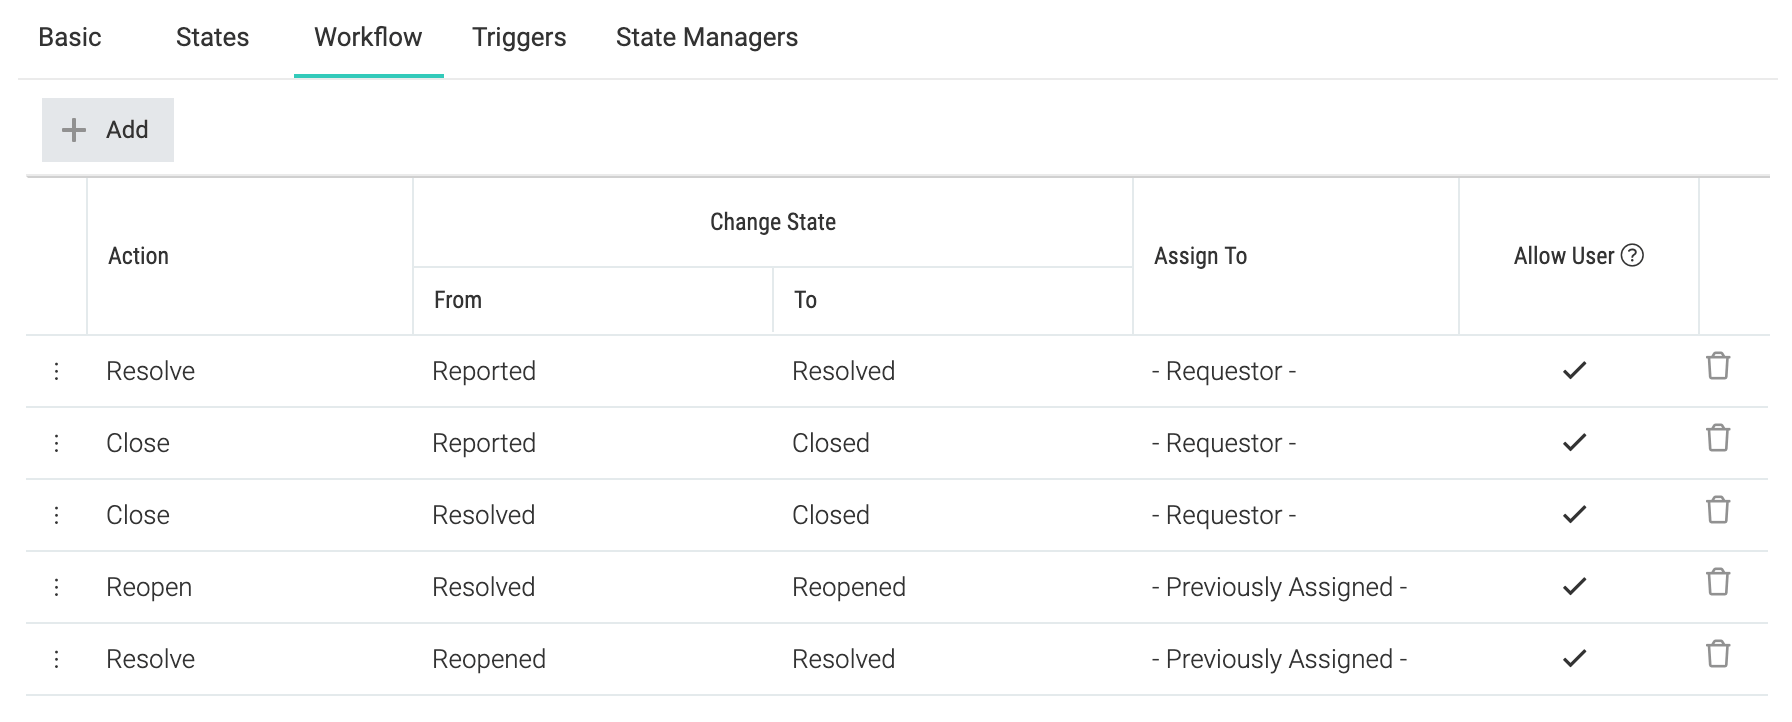
| The name for the action. This will be used in action menus for bugs. | |
| The state where the arrow originates. | |
| The state where the arrow terminates. Once the action is performed, our bug will be moved to this state. | |
| The user to whom the workflow will be assigned to after the action is performed. Prompt in Role: Developer indicates that the user performing the Verify action on the bug will be presented with a list of developers from which to choose the new assignee. | |
| Determines whether this action can be performed by a user. In some cases, we would not want end-users to perform the action. E.g. in help desk systems, unresponsive tickets are automatically closed after a few days of inactivity. |
The Triggers tab
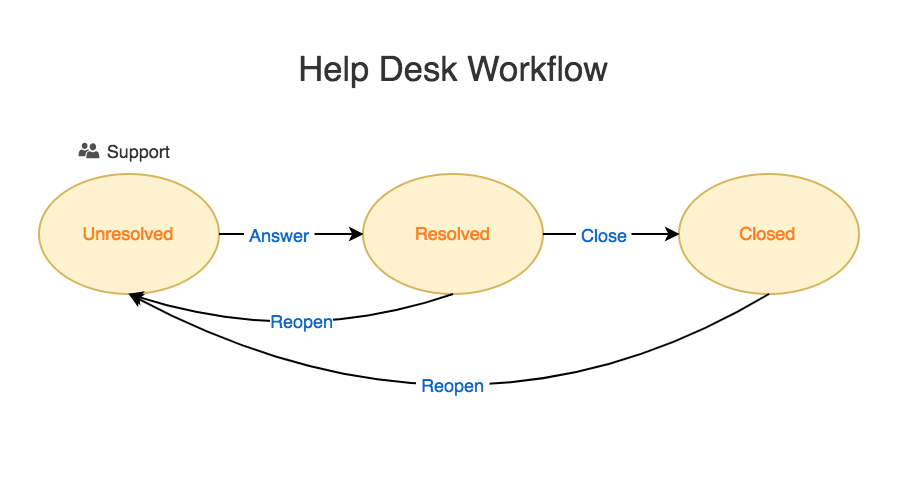
In our bug tracking app, we don't need any triggers. However, let's take this help desk workflow for example. In case of the help desk app, the requestor will be the person who asked a question. When that person replies via email, we would want the ticket to be automatically moved to the Unresolved state as then it would be brought to the attention of the support team. In other words, we would want the Reopen transitions to happen. In this case, we would be defining our triggers like this:

The State Managers tab
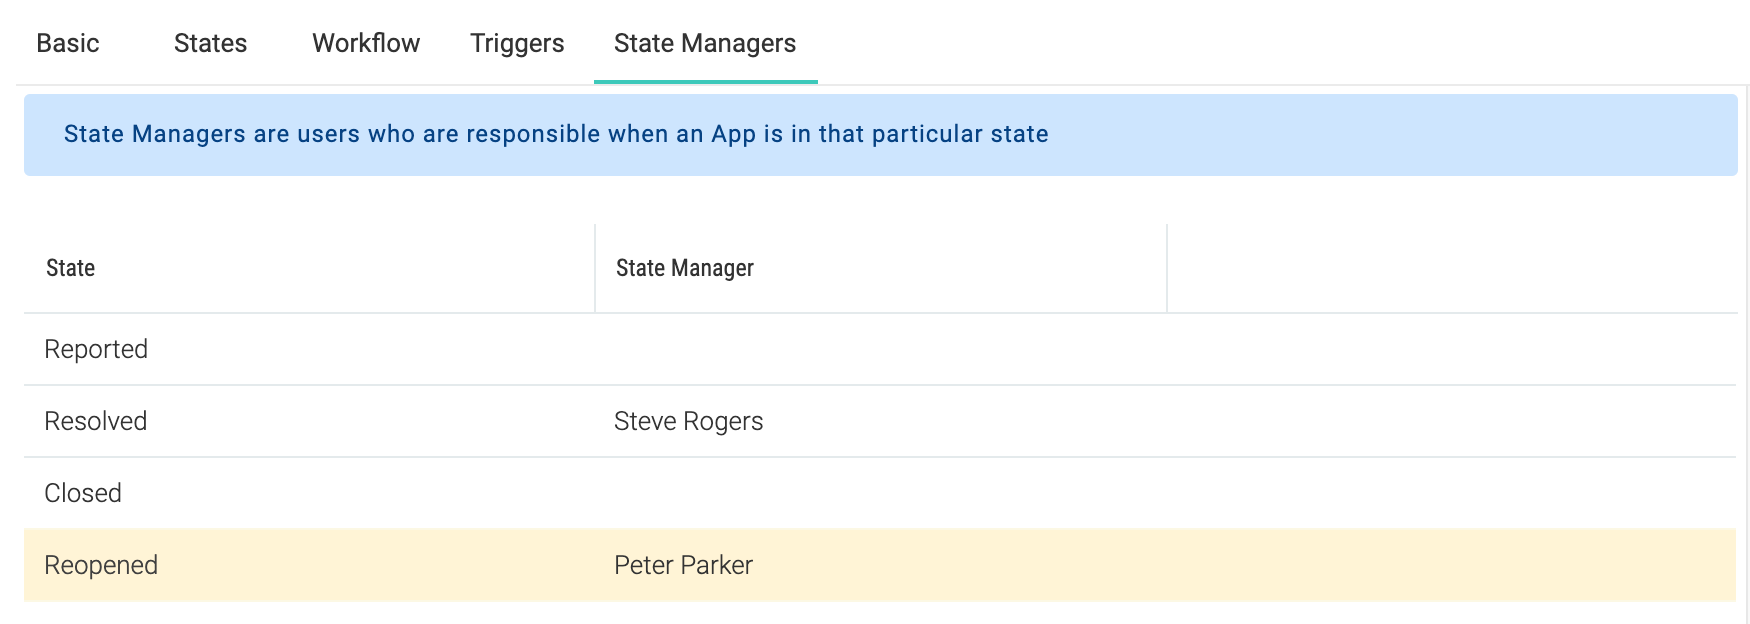
A state managers is a user who is treated as a Manager when an app is in a particular state. They are notified when things happen to an item in this state. In our example below, Mark is the QA manager, so he is responsible for the New and Fixed states where the QA team is supposed to do work.
